Kubernetes Cluster Autoscaler On Hetzner Cloud

Recently I have been setting up a Kubernetes on Hetzner Cloud. The reason of choosing Hetzner Cloud in this instance was purely an economical one, plus the service is good and I have never had any major issues.

One of the most critical aspects of running a cost efficient Kubernetes cluster is to have autoscaling of your cluster nodes. Whats the point in running nodes that have no running pods? It’s just a waste of money and resources. This is where using Kubernetes Cluster Autoscaler comes in.

Cluster Autoscaler monitors pod scheduling to decide if there is enough capacity on your cluster to schedule the pods on a node. If there is not enough capacity to run the pods it will call the Hetzner Cloud API and launch new instances and add them to your cluster. When the pods are no longer needed and are removed from the cluster, Cluster Autoscaler will remove the Kubernetes nodes which are no longer needed and delete the associated instance.

One of the really useful features on Cluster Autoscaler is the ability to have different pools. Pools are distinct sets of nodes, you can chose to have nodes of different instance types, different regions or even have pools which schedule nodes of the same type in the same region but distinctly group them so you can schedule specific pods on specific pools.

This is where the fun started for me, how to schedule specific pods onto specific pools? Having this ability was important for me as I have some workloads which are heavy and also have some security concerns, I did not want these pods running alongside sensitive pods on the same node just incase an attacker was able to escape from the container.

First of all I thought that to schedule the pods on a specific node pool each instance in the node pool would need a label to specify which node pool it belongs to. However the nodes had no such node pool specific labels, so how the heck do we schedule pods on specific node pools? Read on for the explanation.

How to schedule pods on specific node pools

To schedule pods on a specific node pool with Cluster Autoscaler on Hetzner is actually really simple using the following nodeAffinity example.

Note within nodeSelectorTerms, the key being used hcloud/node-group and the value being a list of node pool names to schedule on, in this case I used pool1 as an example. The node pool name comes from the –nodes flag passed to Cluster Autoscaler.

affinity:
  nodeAffinity:
    requiredDuringSchedulingIgnoredDuringExecution:
      nodeSelectorTerms:
        - matchExpressions:
            - key: hcloud/node-group
              operator: In
              values:
                - pool1

So at this point you might be wondering, without node pool specific labels on the nodes? How on earth does Cluster Autoscaler know how to schedule pods on specific node pools? Cluster Autoscaler before actually launching a real instance will first simulate what a real instance would look like, from this simulation it determines if the current scheduled pods would actually fit. You can find the block of code responsible for this process here

It took me some trial and error and code digging to finally figure out how this feature works, so I thought I would share my findings so hopefully no one else has to scratch their head for hours on end trying to figure it out.

If you found this article useful and are yet to sign up with Hetzner Cloud, please consider using my referral link to do so, by using the referral link you will get 20 euros of credit to help you start building your projects on Hetzner Cloud.

Referral Code: https://hetzner.cloud/?ref=OkdP7lCBirsn

Docker Compose Unable To Connect To Port

I have recently been writing some code and decided to use Docker Compose for my development environment. My environment consists of Redis, MySQL and a Flask application. Something strange was happening however when trying to connect to the flask application. Chrome on my local machine would never connect, it was almost as if the port was not listening at all. However looking at netstat showed the port was infact listening and a quick docker inspect showed the port mapping. So why could I not connect to my Flask application running within my docker container? Well it turns out to be something stupidly simple, the Flask application was listening on 127.0.0.1 inside the docker container which is totally separate to 127.0.0.1 on the host machine. In my case to fix this I just made Flask listen on 0.0.0.0 and suddenly I am now able to connect.

I hope the above helps someone else out with a similar issue, I had been scratching my head for a while until I realised what the issue was.

PowerDNS-Admin Reset Lost Password

Recently I started using PowerDNS-Admin to manage DNS records for my various domains. However I managed to somehow delete my user account details from my password manager which effectively locked me out. There appears to be no lost password function so I ended up looking at the source code to see how the password is generated. The below shows the results of my research and will allow you to reset your password directly in the database tables.

Load up a terminal on your local machine, ensure you have python installed and the bcrypt package for python. You can install the bcrypt using pip or your system package manager. Now run an interactive python shell by just typing python on you command line and hitting enter.

Using the code snippet below you can generate a password hash which we will use to update the database.

import bcrypt
bcrypt.hashpw(‘The New Password’, bcrypt.gensalt())
‘$2b$12$4Df.pBcT5YOuA/FZYegZa.DpBUZlDwZJA73rSUyGb8QPL9xnoJT/y’

With the resulting generated hash you can now update the hash in the MySQL database like example below, make sure to replace the hash with the previously generated one and the id with the actual id of your user in the database.

UPDATE `user` SET `password` = `$2b$12$4acDlzbA7ywoLTF0XzdV6uRVm.HM/FML9QiMxf9jt49dBb1E0wN5.` WHERE id=1;

STM8 8-bit Timer Configuration TIM4

The STM8 series of microcontroller’s are extremely budget friendly and provide great features for the money. If you are using SDCC as the compiler for your projects. You have probably found examples for peripherals like timers quite scarce. Here you can see an example of the STM 8-Bit Timer Configuration

Recently I wanted to understand how the basic 8-bit timer TIM4 on the STM8S103F3P6 worked. It took me some time to fully get to grips with, partly for not paying enough attention to the reference manual and datasheet, but also by looking at a bad example I found on Github.

The example I saw for configuring the prescaler of the timer advised to configure the prescaler with a value from one of 128, 64, 32, 16, 6, 4, 0. Using a fx2lafw based logic Analyzer and Pulseview I was seeing some odd results. The timer would overflow before I expected it to. It turns out configuring the prescaler with these values is incorrect.

Correct Prescaler Configuration

According to the datasheet the TIM4_PSCR register only has 3 configurable bits. They range from bit 0 to bit 2

STM8 TIM4 Prescaler

If only 3 bits can be configured, you can not write a value of 128 as this would need an 8 bit wide register. Instead the maximum value we can write is 7 which would set bits from 0 to 2.

STM8 TIM4_PSCR Bits

This means the only values we can set for this timer are 1-7. After some trial and error I figured out that these values represent the division of the input clock to the timer. The examples below are based on a input frequency of 16mhz.

 0x07 = /128 8us      per tick, 2.048ms per overflow
 0x06 = /64  4us      per tick, 1.024ms per overflow
 0x05 = /32  2us      per tick, 512us   per overflow
 0x04 = /16  1us      per tick, 256us   per overflow
 0x03 = /8   0.5us    per tick, 128us   per overflow
 0x02 = /4   0.25us   per tick, 64us    per overflow
 0x01 = /2   0.125us  per tick, 32us    per overflow
 0x00 = /0   0.0625us per tick, 16us    per overflow

I hope this helps when trying to configure the timer, as you can see from my example the maximum delay with a single over flow and a 16mhz clock is 2.048ms. You can however count multiple overflows in the ISR to make a bigger delay.

If you have found this useful or would like me to explain this in greater detail please leave a comment.

Cross Compile Ruby for the Orange Pi Zero

Compiling software directly on the Orange Pi Zero can take some time. CPU, Memory and IO are limiting factors on embedded devices. We can however do the heavy lifting on another more powerful machine. In this example I show how to cross compile Ruby for the Orange Pi Zero. This example shows how to build a statically linked Ruby binary. By statically linking, you avoid having to maintain additional shared libraries.

For the build I used Ubuntu Xenial 16.04 running inside a LXC container. You could use anything running Ubuntu Xenial 16.04 be it a virtual machine, workstation or like myself, an LXC container.

Download the build tools

In addition to the cross compiling toolchain, Ruby is also a required dependency to build Ruby. The reason for this is that the build process runs some Ruby scripts, which checks if dependencies like readline and gdbm are available.

# apt-get install gcc-multilib-arm-linux-gnueabihf build-essential autoconf bison wget ruby

Download the source packages

Download the source packages into your /usr/src directory. I used wget but you could use curl if you prefer.

# cd /usr/src
# wget ftp://ftp.gnu.org/gnu/ncurses/ncurses-6.0.tar.gz
# wget ftp://ftp.gnu.org/gnu/readline/readline-6.3.tar.gz
# wget ftp://ftp.gnu.org/gnu/gdbm/gdbm-1.13.tar.gz
# wget http://zlib.net/zlib-1.2.11.tar.gz
# wget ftp://sourceware.org/pub/libffi/libffi-3.2.1.tar.gz
# wget https://www.openssl.org/source/openssl-1.1.0g.tar.gz
# wget https://cache.ruby-lang.org/pub/ruby/2.4/ruby-2.4.2.tar.gz

Extract the source packages and symlink

# cd /usr/src
# tar xvfz ncurses-6.0.tar.gz
# tar xvfz readline-6.3.tar.gz
# tar xvfz gdbm-1.13.tar.gz
# tar xvfz zlib-1.2.11.tar.gz
# tar xvfz libffi-3.2.1.tar.gz
# tar xvfz openssl-1.1.0g.tar.gz
# tar xvfz ruby-2.4.2.tar.gz

# ln -s ncurses-6.0 ncurses
# ln -s readline-6.3 readline
# ln -s gdbm-1.13 gdbm
# ln -s zlib-1.2.11 zlib
# ln -s libffi-3.2.1 libffi
# ln -s openssl-1.1.0g openssl
# ln -s ruby-2.4.2 ruby

Cross Compile ncurses

# cd /usr/src/ncurses
# CC=arm-linux-gnueabihf-gcc CPPFLAGS="-P" ./configure --host=arm-linux-gnueabihf --without-cxx-binding
# make
# make install DESTDIR=`pwd`/target

Cross Compile readline

You must run autoconf before building readline. I ran into the following error otherwise configure: error: cannot run test program while cross compiling You also need to tell the compiler and linker where the ncurses dependency can be found. In this case ncurses was installed to /usr/src/ncurses/target

# cd /usr/src/readline
# autoconf
# CC=arm-linux-gnueabihf-gcc CFLAGS="-I/usr/src/ncurses/target/usr/include" LDFLAGS="-L/usr/src/ncurses/target/usr/lib" ./configure --host=arm-linux-gnueabihf --enable-static --disable-shared
# make
# make install DESTDIR=`pwd`/target

Cross Compile gdbm

# cd /usr/src/gdbm
# CC=arm-linux-gnueabihf-gcc CFLAGS="-I/usr/src/readline/target/usr/local/include -I/usr/src/ncurses/target/usr/include" LDFLAGS="-L/usr/src/readline/target/usr/local/lib -L/usr/src/ncurses/target/usr/lib" ./configure --host=arm-linux-gnueabihf --enable-static --disable-shared
# make
# make install DESTDIR=`pwd`/target

Cross Compile zlib

# cd /usr/src/zlib
# CC=arm-linux-gnueabihf-gcc ./configure --static
# make
# make install DESTDIR=`pwd`/target

Cross Compile libffi

# cd /usr/src/libffi
# CC=arm-linux-gnueabihf-gcc ./configure --host=arm-linux-gnueabihf --enable-static --disable-shared
# make
# make install DESTDIR=`pwd`/target

Cross Compile openssl

# cd /usr/src/openssl
# CC=arm-linux-gnueabihf-gcc ./Configure -lpthread linux-armv4 no-shared
# make
# make install DESTDIR=`pwd`/target

Cross Compile Ruby

You will notice the ./configure command for Ruby is quite a lot longer than the others. You must tell the compiler and linker where to find the static libraries and headers for the dependencies we have built. As we chose not to install them into the system, each built dependency can be found under /target in the respective directory.

# cd /usr/src/ruby
# CC=arm-linux-gnueabihf-gcc CFLAGS="-I/usr/src/ncurses/target/usr/include -I/usr/src/zlib/target/usr/local/include -I/usr/src/gdbm/target/usr/local/include -I/usr/src/libffi/target/usr/local/include -I/usr/src/openssl/target/usr/local/include -I/usr/src/readline/target/usr/local/include" LDFLAGS="-L/usr/src/ncurses/target/usr/lib -L/usr/src/zlib/target/usr/local/lib -L/usr/src/gdbm/target/usr/local/lib -L/usr/src/libffi/target/usr/local/lib -L/usr/src/openssl/target/usr/local/lib -L/usr/src/readline/target/usr/local/lib" ./configure --host=arm-linux-gnueabihf --disable-install-doc --disable-shared --enable-static --with-static-linked-ext --without-dbm --with-gdbm
# make
# make install DESTDIR=`pwd`/target

Redistribute

All being well Ruby should now be compiled and static linked against the dependencies. Now create an archive of this build to distribute to you Orange Pi Zero

# tar cvfz /usr/src/ruby-2.4.2-static.tar.gz -C /usr/src/ruby/target/ .

Once the archive is built, transfer it to your Orange Pi Zero. I like to use scp for this, but use what works best for you. If you are using the scp example, ensure you replace the IP address with the one of your Orange Pi.

# scp /usr/src/ruby-2.4.2-static.tar.gz root@10.10.10.10:~

Install

Now login to your Orange Pi via SSH and look in the /root directory. You will see the ruby-2.4.2-static.tar.gz file. To install the cross compiled ruby do the following.

# tar cvfz /root/ruby-2.4.2-static.tar.gz -C /

Testing

Ruby is now ready to use, you can test it by running ruby -v. You could also inspect the Ruby binary to see which libraries are linked against it.

# ruby -v
ruby 2.4.2p198 (2017-09-14 revision 59899) [arm-linux-eabihf]
# ldd `which ruby`
libpthread.so.0 => /lib/arm-linux-gnueabihf/libpthread.so.0 (0xb6ee7000) libpthread.so.0 => /lib/arm-linux-gnueabihf/libpthread.so.0 (0xb6ee7000) libdl.so.2 => /lib/arm-linux-gnueabihf/libdl.so.2 (0xb6ed4000) libcrypt.so.1 => /lib/arm-linux-gnueabihf/libcrypt.so.1 (0xb6e95000) libm.so.6 => /lib/arm-linux-gnueabihf/libm.so.6 (0xb6e1d000) libgcc_s.so.1 => /lib/arm-linux-gnueabihf/libgcc_s.so.1 (0xb6df5000) libc.so.6 => /lib/arm-linux-gnueabihf/libc.so.6 (0xb6d09000) /lib/ld-linux-armhf.so.3 (0xb6f0b000)

Summary

In this guide you have managed to cross compile ruby, its required dependencies and get it running on your Orange Pi Zero. I hope you found this useful, if you encountered an issue please leave a comment and I will do my best to help you.

Lezyne Deca Drive 1500xxl Battery Upgrade

November 2015 I bought a new bike light, I was getting into cycling at the time and wanted to be able to commute home from work in the dark. My choice of light in the end was the Lezyne Deca Drive 1500xxl. For those of you that know its an all in one light capable of delivering 1500 lumen’s for over an hour.

Now, almost 2 years later I am still using this quality bike light. However just like laptop batteries, the factory batteries in this light lost some capacity meaning less run time which has become a problem having let me down a couple of times.

Having some electronics experience. I decided to see if I could replace the batteries myself.

Getting Started

The cells inside the Lezyne Deca Drive 1500xxl are 2 x 2800mah 18650. You can get these from eBay or Aliexpress. The ones I am using are Panasonic NCR18650B with tabs. Tabbed cells make assembling the new pack much easier. Not only are 18650 cells hard to solder due to sinking heat rapidly from the soldering iron. The cell can also become damaged from excess heat.

Before building the new battery pack. I charged the cells to ensure they were balanced. This is not absolutely necessary, but if you have a 18650 charger give it a go.

Dismantling

  1. Remove the small T6 screw on the bottom of the light.
  2. Remove the Allen Key bolt holding the mount to the light body.
  3. Using a finger nail, lift up the rubber on off switch button.
  4. Push on the light lens, so the inside of the light slides out the rear of the body.

The battery pack is in the bottom of the light. In this case it was wrapped in a blue heatshrink layer protecting the cells.

Building a new battery pack

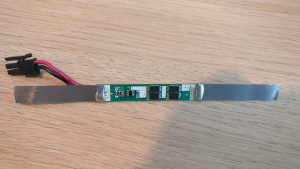
Before building the new pack salvage the protection circuit PCB from the old pack. Do this by using a hobby knife to cut the heat shrink wrap from the existing battery pack. Once inside you will see the PCB attached between the two parallel 18650 cells. Using wire cutters, carefully cut the metal tabs which are attached to the PCB. Cut them as close to the top of the cell as possible. Otherwise you will need to solder new metal tabs to the PCB when building the new pack.

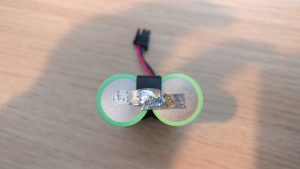
Using a flat surface, glue the two cells together with super glue and solder their tabs together. You MUST ensure the cells are soldered together with the correct polarity. Solder positive to positive and negative to negative. It’s really important you get this right otherwise it is likely the batteries may catch fire or explode. Put some electrical insulation tape length wise between the positive and negative terminals. This helps prevent any short circuit between the PCB and cells.

Now solder the PCB tabs to the positive and negative terminals of the pack while ensuring the correct polarity. You should cover the tabs with heatshrink prior to soldering. Finally wrap the battery in electrical insulation tape. Start with one layer across the top and bottom terminals. Be careful to not make the wrap too thick otherwise you will struggle to fit the new pack in the light upon reassembly.

Testing the new battery pack.

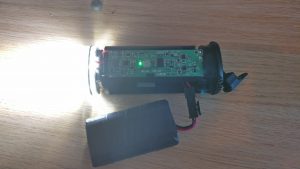
Before putting the light back together, test the battery pack to make sure it works. If you accidentally shorted the batteries when building the pack, the protection circuit should have kicked in. You will need to charge the pack before you can draw power from it. This is a safety feature.

lezyne decca drive 1500xxl testing

Reassemble

Slide the new battery pack into the light. Tuck the connector into the recess at the back. Make sure not to trap any of the wires. You may note the plastic casing looks ever so slightly bowed. I think these cells might be slightly wider than the originals, it does not cause an issue though.

lezyne deca drive 1500xxl upgraded battery

Reassembly is the reverse of disassembly, make sure none of the o’rings or seals are snagged, otherwise water may get into the housing.

lezyne deca drive 1500xxl

Test the light again and feel awesome in the knowledge the battery will last longer.

lezyne deca drive 1500xxl

Ruby On Rails Dynamic Button Text With Form Partial

Recently I have been working on a project using Ruby on Rails. I came across a requirement to Dynamically change the button text on a form partial.

When using a form partial, you are able to use the same block of HTML / ERB code for both create and edit. However the button text for both controller methods would be the same.

The way I have got round this is to do the following.

<%= f.submit @product.persisted? ? "Update" : "Create" %>

In my example, the form that I am working with either creates or updates a Product. By using a shorthand if statement I am able to change the text on the button by checking if the object is already persisted.

When editing an object it will already be persisted to the database, when creating a new object it will not yet be persisted.

This is just one way of achieving the desired functionality, have you come across any other ways? Please leave a comment I would be interested to hear your feedback.

Installing CoreOS On KVM Libvirt Using virt-install Without PXE

This guide explains how to do a custom installation of CoreOS inside a QEMU/KVM virtual machine without the use of scripts, ISO’s or PXE servers.

Firstly you are going to need root access to a KVM host which we assume you already have. The KVM host we are using has a storage pool configured called vm_storage which points to a logical volume, you may use flat files if so you will need to adjust certain aspects of this guide (mainly the virt-install commands)

  1. Download the CoreOS kernel image and ramdisk to /var/lib/libvirt/images.
    [root@microserver ~]# wget https://stable.release.core-os.net/amd64-usr/current/coreos_production_pxe.vmlinuz -O /var/lib/libvirt/images/coreos_production_pxe.vmlinuz
    
    [root@microserver ~]# wget https://stable.release.core-os.net/amd64-usr/current/coreos_production_pxe_image.cpio.gz -O /var/lib/libvirt/images/coreos_production_pxe_image.cpio.gz
  2. Create the temporary virtual machine to configure the image. You will want to configure the name, ram, disk, network and CPU’s to your requirements.
    [root@microserver ~]# virt-install --name vm103 --ram 2048 --disk pool=vm_storage,size=20,bus=virtio,sparse=false --network bridge=br0,model=virtio --noautoconsole --vcpus 2 --graphics none --boot kernel=/var/lib/libvirt/images/coreos_production_pxe.vmlinuz,initrd=/var/lib/libvirt/images/coreos_production_pxe_image.cpio.gz,kernel_args="console=ttyS0 coreos.autologin=ttyS0" --os-type=linux --os-variant=virtio26 
    Starting install...
    Allocating 'vm103' | 20 GB 00:00:00
    Creating domain... | 0 B 00:00:00
    Domain creation completed.
  3. Shortly after the virtual machine should be booted, you can now get to it by typing. Once connected to the console you will already be logged in, no need for a username and password yet.
    [root@microserver ~]# virsh console vm103
    Connected to domain vm103
    Escape character is ^]
    
    core@localhost ~ $
  4. Next up, you need to configure networking. This will allow to download your cloud-config.yml file from where-ever it may be.
    core@localhost ~ $ sudo ip addr add 192.168.2.100/24 dev eth0
    core@localhost ~ $ sudo ip route add default via 192.168.2.1
    core@localhost ~ $ sudo bash
    bash-4.3# echo "nameserver 8.8.8.8" > /etc/resolv.conf
  5. Networking should now be enabled, and you should be able to reach the outside world if you have configured the network settings correctly.
    bash-4.3# ping google.co.uk
    PING google.co.uk (216.58.208.131) 56(84) bytes of data.
    64 bytes from google.co.uk (216.58.208.131): icmp_seq=1 ttl=54 time=4.75 ms
  6. Now download your cloud-config.yml file.
    bash-4.3# wget http://www.greglangford.co.uk/cloud-config.yml
  7. It’s time to install CoreOS to the disk of the virtual machine, you can do this by running the following.
    bash-4.3# coreos-install -d /dev/vda -c cloud-config.yml
  8. After sometime CoreOS should now be installed to disk. You will see several files being downloaded such as coreos_production_image.bin.bz2 followed by a message indicating that CoreOS has been installed.
    [ 654.261067] GPT:Primary header thinks Alt. header is not at the end of the disk.
    [ 654.262990] GPT:9289727 != 41943039
    [ 654.263805] GPT:Alternate GPT header not at the end of the disk.
    [ 654.265395] GPT:9289727 != 41943039
    [ 654.266316] GPT: Use GNU Parted to correct GPT errors.
    [ 654.268226] vda: vda1 vda2 vda3 vda4 vda6 vda7 vda9
    [ 654.360897] GPT:Primary header thinks Alt. header is not at the end of the disk.
    [ 654.362542] GPT:9289727 != 41943039
    [ 654.363193] GPT:Alternate GPT header not at the end of the disk.
    [ 654.364297] GPT:9289727 != 41943039
    [ 654.364946] GPT: Use GNU Parted to correct GPT errors.
    [ 654.365878] vda: vda1 vda2 vda3 vda4 vda6 vda7 vda9
    Success! CoreOS stable 1068.9.0 is installed on /dev/vda
  9. It’s time to shutdown your virtual machine and destroy it!
    bash-4.3# shutdown -h now

    You might find it odd that we are destroying the virtual machine. However remember when we first booted it we specified the kernel and ramdisk to load? Well we no longer need these, CoreOS is installed to disk and has it’s own bootloader, in a moment we will import our new disk image into a fresh virtual machine.

  10. Time to destroy the old virtual machine, be careful not to remove the disk image / logical volume that was created as we will need this. You may get an error running virsh destroy as the virtual machine should already be in an off state from running shutdown -h now. If so you can ignore this error.
    [root@microserver ~]# virsh destroy vm103
    error: Failed to destroy domain vm103
    error: Requested operation is not valid: domain is not running
    
    [root@microserver ~]# virsh undefine vm103
    Domain vm103 has been undefined
  11. Finally it’s time to bring your brand new shiny CoreOS virtual machine online.
    [root@microserver ~]# virt-install --import --name vm103 --ram 2048 --disk path=/dev/vm_storage/vm103,bus=virtio --network bridge=br0,model=virtio --noautoconsole --vcpus 2 --graphics none --os-type=linux --os-variant=virtio26
    
    Starting install...
    Creating domain... | 0 B 00:00:00
    Domain creation completed.

    The above command looks very familiar, however note the subtle differences. We have used –import to tell virt-install not to create a new disk image or logical volume. Instead we are importing the one from our original virtual machine. Other settings such as name, ram, disk, network, cpu etc should stay the same.

  12. You can now load a console to your CoreOS virtual-machine.
    [root@microserver ~]# virsh console vm103
    Connected to domain vm103
    Escape character is ^]
    
    
    This is localhost (Linux x86_64 4.6.3-coreos) 23:28:06
    SSH host key: SHA256:roBG5+kn34mjBKfGimAI4gtRtEh0qsjkk4KD3rPF7jM (ECDSA)
    SSH host key: SHA256:lugGHjMdEThSXzK8UpB94nTprGfG5Aqdz4CM+S3FZuA (RSA)
    SSH host key: SHA256:j7bCgrKOaUcjt/qWeAmbSZq+bqtvXKszvHLDcQhXz+U (ED25519)
    SSH host key: SHA256:gNKZztPfsw89wFnIIJ66ciHK+/hwFq/a3L865vit5OQ (DSA)
    eth0: 192.168.2.39 2a00:23c4:3f1b:7801:5054:ff:fe43:becb
    
    localhost login:

    Depending on how quickly you connect to the console, you may see a different output until the virtual machine finishes booting.

I hope you have enjoyed this guide and found it useful, if you have any questions or feedback you can get in contact with me via the comments. Thanks for reading.

Host to Host IPsec Tunnel With Libreswan On CentOS 7.2

This is a guide on setting up a Host to Host IPsec tunnel between two CentOS 7.2 hosts. We will be using Libreswan as the implementation of IPsec. Libreswan is available in CentOS 7.2 in the default package repositories.

Before you get started you are going to need two CentOS 7.2 servers, I am using KVM virtual servers in this example, you can use either real metal or a KVM virtual server. I have not tried this on other hypervisors, but I would be interested to hear if you have success using anything other than KVM.

One of my virtual servers will be hosted on Digital Ocean and the other is running on a HP Microserver in my office. The IPsec tunnel will be initiated from the virtual server running on the HP Microserver as this is behind a NAT. Essentially the local virtual server will be a road warrior in this instance.

IPsec Topology

Installing and Configuring libreswan

Login to each of your virtual machines and install Libreswan, you can do this by running the following.

yum install -y libreswan

You should now have the config file /etc/ipsec.conf and the directory /etc/ipsec.d now run the following command

ipsec status

As the IPsec service has not yet been started you should get a message like the following.

whack: Pluto is not running (no "/var/run/pluto/pluto.ctl")

Ok good, now Libreswan is installed

Next up you need to configure your RSA keys, we will be using RSA keys for authentication as it provides a higher level of security than a private shared key.

You need to initialize the NSS database and then generate the hostkey, this step must be done on both virtual servers.

# ipsec initnss
Initializing NSS database
See 'man pluto' if you want to protect the NSS database with a password

# ipsec newhostkey
/usr/libexec/ipsec/newhostkey: WARNING: file "/etc/ipsec.secrets" exists, appending to it
Generated RSA key pair using the NSS database

It may take some time to generate the key depending on how much entropy /dev/random provides. Once the key generation process completes you will get the following message.

/usr/libexec/ipsec/newhostkey: WARNING: file "/etc/ipsec.secrets" exists, appending to it
Generated RSA key pair using the NSS database

Now the key generation is complete we can start by creating our config files, we will do this first on our Digital Ocean virtual server.

Using your favourite text editor, create the file /etc/ipsec.d/host-to-host.conf and fill it with the following contents.

conn host-to-host
 left=%defaultroute
 leftsubnet=178.50.30.10/32
 leftrsasigkey=
 leftid=@digitalocean
 right=%any
 rightsubnet=192.168.2.100/32
 rightrsasigkey=
 rightid=@home
 dpddelay=5
 dpdtimeout=30
 dpdaction=restart
 auto=add

You should replace leftsubnet= with the public IP address of your Digital Ocean virtual server followed by /32 to indicate the subnet is a single host.

Also you need to replace leftrsasigkey= with the leftrsasigkey for that host, run the following command on your Digital Ocean virtual server. And copy from and including leftrsasigkey= right up until and including the last character. Use this value to replace the blank leftrsasigkey= value.

# ipsec showhostkey --left
ipsec showhostkey loading secrets from "/etc/ipsec.secrets"
ipsec showhostkey no secrets filename matched "/etc/ipsec.d/*.secrets"
ipsec showhostkey loaded private key for keyid: PPK_RSA:AQPJRZtjt
 # rsakey AQPJRZtjt
 leftrsasigkey=0sAQPJRZtjtcRrGWKk3fOau+1M1HjY0KDGWtDSF/I4s1uQLBx8tI0inoH7dypvowq/pI/AksjEh+s+gyJxWiWUtO7oyKm/I3jPxCbED90RTe8mloAEinjPVBQqpUMQOdBC315xPxxp1Ay8EMmbMrPXRTKqWuscoEfDtfUFuD/hE+3fXub9VGWhbjimAAp5aeYCSW+vGymRDFeRejoBbqIBc1FRiNWinrSgV6+lfmzq305cv9hK1+1fEvAr6R1gu4jxrxjaQpWwI37Qz5dSKjZ26eqApUnGgyEZS4pD8pJ1fk/TcDrScD0o42KiDjHOVltvHmb9b5hzGYlwnkZAewjYNoGAIWlB1uMzv7GNOGIQjxpqiNlKVO3+EepONTRlR1bQya5FoMgSZ1v9OZkxjn5q0LjHAS2jg2iEVdXTVV/ng69PT+J7Cp4YXmO5pAzvdcQwg6rLawLAfck6k9+GpfElgGTV31g6E/hV4sE7U75SOvMglFfstGBoftKnT/jziAztVPEcpLLruOPKCPlQHzHDdGT+0QLTozi7GK9iT1YlOedkMKcPCLp+SSAkYHzofe2JVr0+pev+760XvFkPMRPGw1W1

Now replace rightsubnet= with your other virtual servers private IP address followed by /32 in our example we use 192.168.2.100/32

You should also replace rightrsasigkey= you must get this value from your other virtual server, in our case we login to 192.168.2.100 and run the following command.

# ipsec showhostkey --right
ipsec showhostkey loading secrets from "/etc/ipsec.secrets"
ipsec showhostkey no secrets filename matched "/etc/ipsec.d/*.secrets"
ipsec showhostkey loaded private key for keyid: PPK_RSA:AQPAcILGW
 # rsakey AQPAcILGW
 rightrsasigkey=0sAQPAcILGW8l0YmIfPkNCEbN1N5Lna3qb/Yjj4bD2u0wNvKUSO2j62xhdCavPLoBFtNfJnMnaMNtAr8odNMTCig2Tu8ZXQVajszQwmCVGRAATK82L+nO0LBD4bJRlA86un352bzAMPBcLZgwmEA//bYznzQ036sch5ooQ3YMailgRR9IKkPezx1Nz9ny5uaZLGN7uxzWMOxllfMyCRBj52bf1JMDwShPFS72NuBIi2ZxzasHeO1OyPl5KHprDJH3j8fO2qmYKAivr4vQt54MsjHd89/ePr6gg/nfEpVAFhw2Pxv+vERQhXgvX/CSVQXMtiVrWyJH4s803XDoYRMfsW8Q1XsAeDFTOq18Wf1jh0GhP70OrfOFDvURITwIZNnVXTxJ+u8cOYnKxgahQ5+H7gyP9JWunufb+F0IVPx8tc0jFgCpidlVBozEOZLmG7fRi5ReU5UmdMZhv4fI4yW7ewZhYQt/hEKdLddUyZtTkZbyKHoFlPWBhiuaX0CBDXWj8dy0+kNPv

Replace rightrsasigkey with the rightrsasigkey value returned from the previous command.

This configuration file is now complete, you may run the following to start the IPsec service.

# systemctl start ipsec

Now run the following to confirm that the config file has been loaded. You will see in the output the host-to-host connection information. This means IPsec is ready to receive connections, we must first configure the other side of the tunnel.

# ipsec status
...
000 Connection list:
000
000 "host-to-host": 178.50.30.10/32===178.50.30.10[@digitalocean]---178.50.30.1...%any[@home]===192.168.2.100/32; unrouted; eroute owner: #0
000 "host-to-host": oriented; my_ip=unset; their_ip=unset
000 "host-to-host": xauth info: us:none, them:none, my_xauthuser=[any]; their_xauthuser=[any]
000 "host-to-host": modecfg info: us:none, them:none, modecfg policy:push, dns1:unset, dns2:unset, domain:unset, banner:unset;
000 "host-to-host": labeled_ipsec:no;
000 "host-to-host": policy_label:unset;
000 "host-to-host": ike_life: 3600s; ipsec_life: 28800s; rekey_margin: 540s; rekey_fuzz: 100%; keyingtries: 0;
000 "host-to-host": retransmit-interval: 500ms; retransmit-timeout: 60s;
000 "host-to-host": sha2_truncbug:no; initial_contact:no; cisco_unity:no; send_vendorid:no;
000 "host-to-host": policy: RSASIG+ENCRYPT+TUNNEL+PFS+IKEV1_ALLOW+IKEV2_ALLOW+SAREF_TRACK+IKE_FRAG_ALLOW;
000 "host-to-host": conn_prio: 32,32; interface: eth0; metric: 0; mtu: unset; sa_prio:auto; nflog-group: unset;
000 "host-to-host": dpd: action:restart; delay:5; timeout:30; nat-t: force_encaps:no; nat_keepalive:yes; ikev1_natt:both
000 "host-to-host": newest ISAKMP SA: #0; newest IPsec SA: #0;
000 "v6neighbor-hole-in": ::/0===::1<::1>:58/34560...%any:58/34816===::/0; prospective erouted; eroute owner: #0

On your local virtual server (192.168.2.100 in this example) create the following configuration file using your favourite text editor /etc/ipsec.d/host-to-host.conf again you will need to replace some values.

conn host-to-host
 left=%defaultroute
 leftsubnet=192.168.2.41/32
 leftrsasigkey=
 leftid=@home
 right=178.50.30.10
 rightsubnet=178.50.30.10/32
 rightrsasigkey=
 rightid=@digitalocean
 dpddelay=5
 dpdtimeout=30
 dpdaction=restart
 auto=start

rightsubnet= should be replaced with the private IP address of your local virtual server followed by /32 to indicate a single host.

leftrsasigkey= should be replaced with the value returned from running the following command on the local virtual server.

# ipsec showhostkey --left
ipsec showhostkey loading secrets from "/etc/ipsec.secrets"
ipsec showhostkey no secrets filename matched "/etc/ipsec.d/*.secrets"
ipsec showhostkey loaded private key for keyid: PPK_RSA:AQPAcILGW
 # rsakey AQPAcILGW
 leftrsasigkey=0sAQPAcILGW8l0YmIfPkNCEbN1N5Lna3qb/Yjj4bD2u0wNvKUSO2j62xhdCavPLoBFtNfJnMnaMNtAr8odNMTCig2Tu8ZXQVajszQwmCVGRAATK82L+nO0LBD4bJRlA86un352bzAMPBcLZgwmEA//bYznzQ036sch5ooQ3YMailgRR9IKkPezx1Nz9ny5uaZLGN7uxzWMOxllfMyCRBj52bf1JMDwShPFS72NuBIi2ZxzasHeO1OyPl5KHprDJH3j8fO2qmYKAivr4vQt54MsjHd89/ePr6gg/nfEpVAFhw2Pxv+vERQhXgvX/CSVQXMtiVrWyJH4s803XDoYRMfsW8Q1XsAeDFTOq18Wf1jh0GhP70OrfOFDvURITwIZNnVXTxJ+u8cOYnKxgahQ5+H7gyP9JWunufb+F0IVPx8tc0jFgCpidlVBozEOZLmG7fRi5ReU5UmdMZhv4fI4yW7ewZhYQt/hEKdLddUyZtTkZbyKHoFlPWBhiuaX0CBDXWj8dy0+kNPv

right= should be replaced with the public IP address of your Digital Ocean virtual server.

rightsubnet= should be replaced with the public IP address of your Digital Ocean virtual server followed by /32 to indicate a single host.

rightrsasigkey= should be replaced with the value returned from running the following command on the Digital Ocean virtual server.

# ipsec showhostkey --right
ipsec showhostkey loading secrets from "/etc/ipsec.secrets"
ipsec showhostkey no secrets filename matched "/etc/ipsec.d/*.secrets"
ipsec showhostkey loaded private key for keyid: PPK_RSA:AQPJRZtjt
 # rsakey AQPJRZtjt
 rightrsasigkey=0sAQPJRZtjtcRrGWKk3fOau+1M1HjY0KDGWtDSF/I4s1uQLBx8tI0inoH7dypvowq/pI/AksjEh+s+gyJxWiWUtO7oyKm/I3jPxCbED90RTe8mloAEinjPVBQqpUMQOdBC315xPxxp1Ay8EMmbMrPXRTKqWuscoEfDtfUFuD/hE+3fXub9VGWhbjimAAp5aeYCSW+vGymRDFeRejoBbqIBc1FRiNWinrSgV6+lfmzq305cv9hK1+1fEvAr6R1gu4jxrxjaQpWwI37Qz5dSKjZ26eqApUnGgyEZS4pD8pJ1fk/TcDrScD0o42KiDjHOVltvHmb9b5hzGYlwnkZAewjYNoGAIWlB1uMzv7GNOGIQjxpqiNlKVO3+EepONTRlR1bQya5FoMgSZ1v9OZkxjn5q0LjHAS2jg2iEVdXTVV/ng69PT+J7Cp4YXmO5pAzvdcQwg6rLawLAfck6k9+GpfElgGTV31g6E/hV4sE7U75SOvMglFfstGBoftKnT/jziAztVPEcpLLruOPKCPlQHzHDdGT+0QLTozi7GK9iT1YlOedkMKcPCLp+SSAkYHzofe2JVr0+pev+760XvFkPMRPGw1W1

Now save the configuration file and start the IPsec service on your local virtual server.

# systemctl start ipsec

Check the ipsec status, all being well the tunnel should be established and you should be able to send traffic to private IP address of your local virtual server from your Digital Ocean virtual server.

# ipsec status
000 #4: "host-to-host":4500 STATE_QUICK_I2 (sent QI2, IPsec SA established); EVENT_SA_REPLACE in 26838s; newest IPSEC; eroute owner; isakmp#3; idle; import:admin initiate
000 #4: "host-to-host" esp.498fa27b@178.50.30.10 esp.af78dce2@192.168.2.100 tun.0@178.50.30.10 tun.0@192.168.2.100 ref=0 refhim=4294901761 Traffic: ESPout=0B ESPin=0B! ESPmax=4194303B
000 #3: "host-to-host":4500 STATE_MAIN_I4 (ISAKMP SA established); EVENT_SA_REPLACE in 1647s; newest ISAKMP; lastdpd=0s(seq in:25944 out:0); idle; import:admin initiate

From your Digital Ocean virtual server try and SSH to your local virtual server on it’s private IP address.

# ssh root@192.168.2.100
The authenticity of host '192.168.2.100 (192.168.2.100)' can't be established.
ECDSA key fingerprint is 3c:6f:2b:a9:1d:d2:f6:22:e8:b2:2f:54:e2:f5:92:05.
Are you sure you want to continue connecting (yes/no)? yes
Warning: Permanently added '192.168.2.41' (ECDSA) to the list of known hosts.
root@192.168.2.100's password:
Last login: Sun Aug 14 12:31:50 2016 from 127.0.0.1
#

Congratulations, you have now configured an IPsec tunnel between two hosts. If you have any problems or feedback please leave a comment!

Using Apache To Reverse Proxy HDHomerun Stream

Recently I bought a HDhomerun with the intention of being able to stream TV over the network so it can be access internally or externally. When I initially tried to connect to the HTTP stream on the HDhomerun externally the connection was refused. It appears that unless the connection originates on the same subnet as the HDhomerun the connection request will be refused.

To work round this I tried to tunnel the stream port via SSH, however the performance was awful and the stream kept breaking up. Looking back I suspect this was to do with SSH compression. It’s very likely SSH was trying to compress the data on the fly (from what I recall compression on SSH is enabled by default)

As the stream is delivered over HTTP I then decided that using Apache as a reverse proxy would most likely work. I configured Apache on a VM on my local network and configured a virtualhost like the following.

<VirtualHost *:8080>
 ServerName localhost
 ProxyPass / http://192.168.2.23:5004/
 ProxyPassReverse / http://192.168.2.23:5004/
 </VirtualHost>

Don’t forget you also need to tell Apache to listen on port 8080, you can do this by adding the following line in httpd.conf, you are not limited to port 8080 you could use what ever port number you like as long as it’s available.

Listen 8080

Initially when trying to load the stream I got the following error in the Apache error log.

[Mon Aug 03 09:35:01.514542 2015] [proxy:error] [pid 12623] (13)Permission denied: AH00957: HTTP: attempt to connect to 192.168.2.23:5004 (192.168.2.23) failed
 [Mon Aug 03 09:35:01.514609 2015] [proxy:error] [pid 12623] AH00959: ap_proxy_connect_backend disabling worker for (192.168.2.23) for 60s
 [Mon Aug 03 09:35:01.514623 2015] [proxy_http:error] [pid 12623] [client 192.168.2.2:63150] AH01114: HTTP: failed to make connection to backend: 192.168.2.23, referer: http://192.168.2.24:8080/
 [Mon Aug 03 09:37:51.969710 2015] [core:warn] [pid 12620] (13)Permission denied: AH00056: connect to listener on [::]:8080

After a little research it turns out it was being caused by SELinux. For the sake of quick testing I disabled SELinux then restarted Apache and all started working.

Once I configured port forwarding on my router I was able to access the stream via the Proxy using VLC media player.

http://:8080/auto/v1

I hope these notes guide helps anyone else trying to achieve the same thing.