It’s no secret that college’s, universities and employers use web content filters (also known as proxies) to limit the range of websites you may access. Maybe it’s to mitigate industrial espionage or protect you from seeing unsuitable content. Either way it can be fairly annoying especially if some genuine websites become blocked.
Before we go into the details on how to bypass these controls, you should be fully aware that you are most probably breaking some rules. It could be a clause in your contract of employment or in some sort of computer and network usage policy. We are not responsible if you ignore these warnings, if you decide to punch a hole through in place protection mechanisms it’s your own problem if you get caught, fired, sacked whatever else. Do not come crying here, you have been warned.
First things first we are going to need a server of some sort running Linux. You can get yourself a really cheap VPS from Digital Ocean (my referral link is included) they also have a range of locations to choose from. To get your VPS (also known as a Droplet in Digital Ocean speak) you should follow this guide https://www.digitalocean.com/community/tutorials/how-to-create-your-first-digitalocean-droplet-virtual-server in our example we will be using Debian 8.1 x64 but in reality the choice of Linux distribution will not make much difference as long as you can locate the SSH config file.
Now you have your VPS up and running, login using your favorite SSH client, you will need to login as root or use sudo to gain root privileges if logging in as a non privileged user. You need to edit the sshd_config file to allow SSH to listen on multiple ports. We want to listen on port 22 and port 443.
nano /etc/ssh/sshd_config
Find the row which denotes the port which SSH is configured to listen on, it will look like this.
Port 22
Add an additional row underneath this to allow sshd to listen on port 443
Port 443
Now save the changes and quit out of nano, you can use Ctrl + x to quit and be prompted to save or Ctrl+o to save and then Ctrl+x to quit.
For the next step make sure to restart the SSH service, on Debian you can do this by running the following command.
/etc/init.d/sshd restart
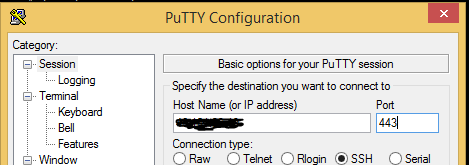
Your SSH server should now be listening on both port 22 and 443, you can test it by opening a new SSH connection to the server IP but change the port number 22 for 443, it would look like this if you were using Putty.
Now you should be able to login again using the same user account you used last time.
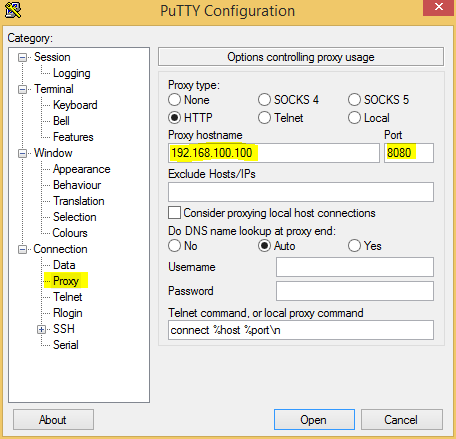
If you have got this far you are ready to bypass the proxy content filter. Open Putty make sure its a new Window and not an existing session as the Proxy configuration options do not work if it’s a Window of a current session. Next configure the proxy settings in Putty to be the same as the ones your network is using, you can sometimes find these in the proxy settings of your web browser.
In our case we are using the proxy IP of 192.168.100.100 and the port 8080.
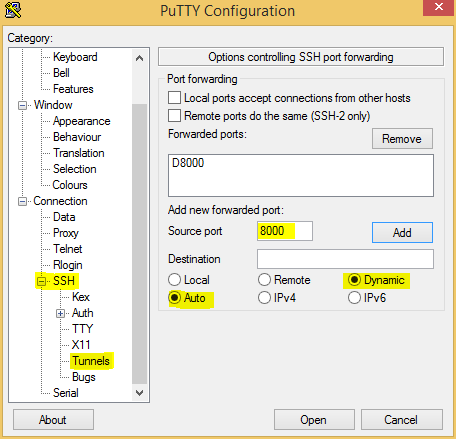
To actually tunnel the traffic we need to make Putty act as a dynamic proxy (socks proxy) so within the same Putty window as before, click on SSH and then Tunnels. You should enter the source port as 8000 and select the Dynamic radio button then click add.
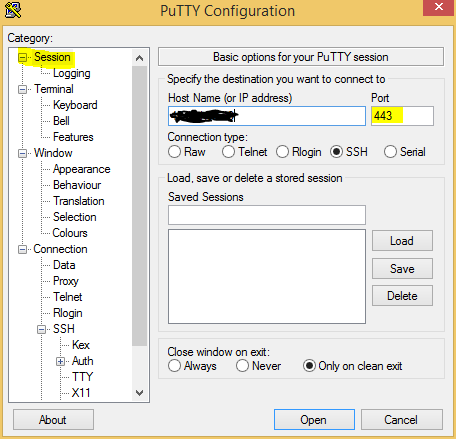
We are very very nearly there now, still within Putty on the left hand side scroll back up to Session, you should now enter the IP address of your VPS and the port 443 and ensure the connection type is set as SSH just as we done when we tested port 443 was accepting SSH connections. Once you are happy the configuration is correct click the Open button and then login one more time.
If you have managed to login at this point, then congratulations you just punched a hole through the proxy content filter, you should be logged into the shell of your VPS.

One last step is to reconfigure your web browser to point at the Putty dynamic proxy we configured listening on port 8000. Remember the proxy type is SOCKS not HTTP. In Internet Explorer it might look like this.
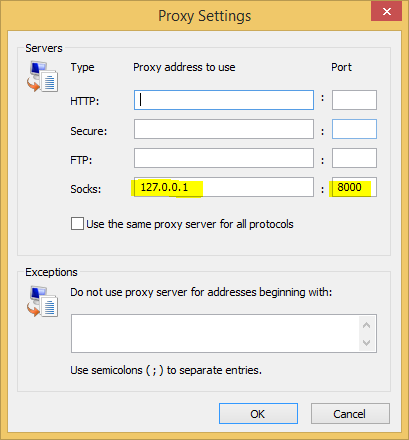
You could now browse to a website like http://www.whatismyip.com if the IP address is reported as the IP address of your VPS then you now have unrestricted access to the web.
Enjoy and remember to be responsible, mechanisms like proxy content filters are put in place for a good reason. If not to protect you from seeing unsuitable content to at least protect the network to some degree from spyware, viruses etc.